Your coffee machine might be the only thing that prepares you to face the day. That first cup of Joe hits, and you feel like you can do anything. That first cup of coffee is the sweet taste of productivity hitting your brain. A problematic coffee maker is one of the worst things that can befall a person while trying to start their day.
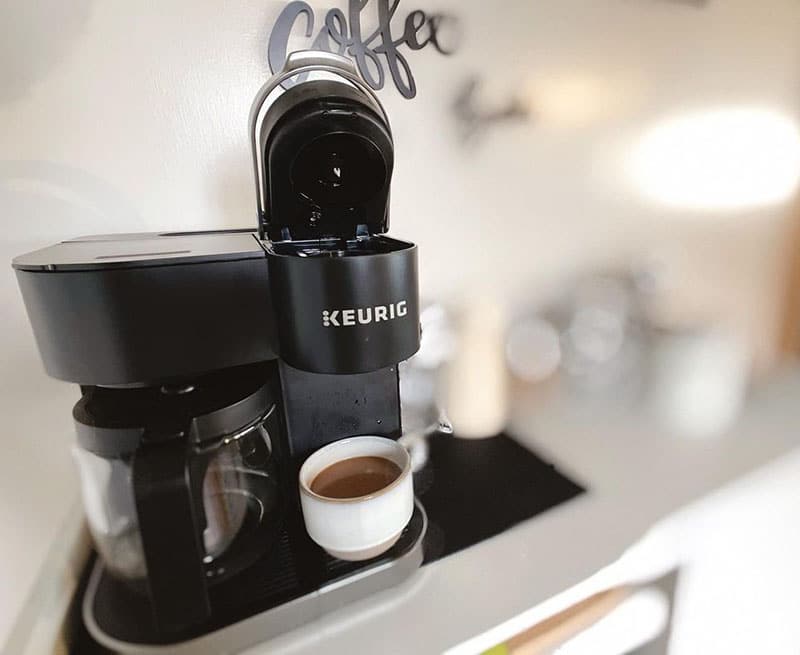
Let’s say you awake in the morning and set your Keurig to run at a certain time. You see this light emanating from your coffee machine. But it’s not the light of God, and no angels are singing, as one would expect when the Nectar of the Gods is being produced. No, your coffee maker’s lights are on, and it’s not producing.
What do you do? While resisting the urge to throw the thing out of the nearest window, what are you supposed to do now? You can’t drink tea as a replacement morning pick-me-up. Well, there are a few relatively simple why all of your Keurig’s lights are on and it’s not producing the good stuff.
There could be several reasons why all of your Keurig lights are on – and it’s usually not because it has decided to go all Jean-Michelle Jarre on you. Coffee machines are fairly simplistic – particularly Keurig’s single-cup machines – there’s not a lot to them and, therefore, not a lot that can go wrong. Here’s why your Keurig may be throwing up an error and holding a light show.
- Your Keurig needs to be descaled, and some Keurig models may show a descale message when it’s time to clean that sucker. This is the most common cause of your coffee machine’s disco ball routine.
- The water filter on your Keurig may not be installed correctly – or your cold water reservoir may be empty or low. A blue flashing light may indicate the low cold water reservoir.
- Your brewing needle may be clogged. A clogged needle could mean water cannot flow through the machine properly and into your waiting coffee vessel.
- If you’re getting a water level error, consider your water source. Suppose you’re using distilled water instead of tap water or bottled water. In that case, some Keurigs have a sensor that detects minerals in the water – this is how it detects low or empty water levels – if this is the case, your water source may be the problem and should be switched to see if that fixes the issue.
These are the most common problems that cause a Keurig to go haywire on you. Before you hurl your Keurig into the abyss or contact Keurig customer service, we’ll show you how to remedy your coffee maker machine problems.
How Do You Fix A Keurig With All The Lights On?
There are a few easy ways to fix your drip coffee maker without breaking the bank or leaving the house! Following the below steps will have you troubleshooting, fixing, and making amazing coffee in no time.
Your Keurig Coffee Machine Could Be Clogged

One of coffee lovers’ most common problems with their machines is clogging. This clogging can occur in different places within the coffee machine and is fairly simple to clean out.
First, check your exit needle. This is the little nozzle through which hot coffee flows into your cup. Over time, this exit needle can become clogged with gunk, including coffee grounds and other sludge.
You’ll need to gather a clean coffee mug and a straightened paper clip (a safety pin will also do the job). Next, turn off and unplug your Keurig from the wall outlet. Place your coffee mug under the brew head as if you were brewing a cup of coffee.
Remove the K-cup pod holder from your K-Mini Plus or other Keurig machine and rinse the pod holder thoroughly. If you’re giving your machine a deep clean, let the pod holder sit in a warm water and soap solution for a few minutes while you unclog the brewing needle.
Your next step is to unclog the needle by putting your straightened paper clip or safety pin into the hole and rotating it around slowly. This will loosen any excess coffee grounds and other built-up coffee debris clogging the exit needle.
Once this is done, rinse the pods and the exit needle under warm water and set them aside to dry.
Next, you’ll want to clean the entry needle. This is where the water enters your Keurig system before mixing with the ground coffee to produce fresh coffee. Lift your brewer head, which contains a very sharp entrance needle. Insert your safety pin or paper clip into these needles and wriggle them around to loosen up coffee debris.
Next, reattach your K-cup pod holder into the open slot and close your Keurig. Place your mug into the maker and run a cleaning water-only brewing cycle. This will allow your Keurig to perform a cleansing brew. If you still notice restricted water flow, you have other problems.
What if The Lights Are Still On After Unclogging?
If your Keurig is still having issues when in normal mode, then it’s likely that other issues are preventing your Keurig from completing a normal brewing process.
There’s A Hole in The Tubes of Your Keurig Machine
As part of the brewing process, water flows through tubes before reaching your coffee pot or coffee cup. This is the case with all drip coffee makers. If you notice that water isn’t reaching your entry needle and spilling out onto the counter, you may have a hole in your machine’s tubes.
The first time you notice this, you should unplug your machine from the active outlet and dry the machine as much as you can. Even leaving it off for a night should do the trick. Please make sure that all electrical components are dry. You can order replacement water inlet tubes from Amazon or Keurig directly. Instructional videos on YouTube show you how to replace these tubes.
After replacing these tubes, please run a water-only brewing cycle to test whether or not you’ve done this correctly. If your coffee pot fills with water, you have successfully fixed your issue!
A Misaligned Charcoal Water Filter
Another common problem with coffee makers is a misaligned charcoal water filter. Many coffee makers – like Keurig and Cuisinart- use charcoal water filters to help dechlorinate water as it moves from your coffee pot water reservoir to your cup!
Your charcoal water filter should fit snugly in your water filter holder – this should be indicated in your user manual. Charcoal water filters must be replaced every sixty days or sixty coffees, and this is a manual process that should take about 15 minutes.
You can start by soaking your charcoal pods in water to activate the charcoal, and this should take ten minutes. Once this is complete, place your newly-activated charcoal pod into the holder and replace the holder in the machine.
If you have recently replaced your charcoal water filter, it’s more likely that it has become dislodged or misaligned. To check this, remove the filter holder and re-align your activated charcoal properly.
Does A Keurig Have A Reset Button?
There are many Keurig models – some have a ‘reset button’ function – others do not. Most of the early Keurig models won’t have a reset function. However, a few models have a reset button – this will perform a hard reset of your Keurig with a power cycle.
The following models that have reset buttons include:
How Can I Reset My Keurig?
Resetting each of the Keurig machines is a slightly different process. We’ll break them down below:
- Keurig K-Duo
1. Press the Power Button
2. Press and hold the 8-oz and 10-oz cup buttons together for five seconds.
- Keurig K-Classic
- Hold Medium Cup, Large Cup, and Auto Off buttons simultaneously for a few seconds.
This should allow your K-Classic to reboot.
- Keurig K-Supreme Plus
- When your K-Supreme is turned on, press the two arrow buttons simultaneously to enter the menu.
- Click Next, then click through to the Factory Reset option. This will reset your machine to its factory settings and allow you to restart from scratch.
- Press ‘K’ to confirm this choice. Afterward, your machine will begin a resetting cycle and then prompt you to unplug the machine for 10 seconds and then plug it back in. Follow these prompts to reset your machine.
If your model isn’t included in this list, you need to power down your Keurig by pressing the power button, unplugging your Keurig from the wall, and then plugging it back in. You could also leave the Keurig unplugged overnight with the water reservoir removed.
How Long Will My Keurig Last?
The average lifespan of a Keurig is three to five years. Your favorite coffee maker should last this long, providing that you clean it regularly. Unplugging your coffee maker at night would be best to make it last a little longer.
Of course, the life expectancy of your Keurig varies based on usage. If you’re a coffee fanatic and use your coffee maker daily, your Keurig will likely last on the lower end of that scale.
One way to ensure that the different removable parts of your Keurig last longer is to keep your coffee maker clean by removing the individual parts, rinsing them after each use, and letting them dry overnight.
Your coffee equipment is only as good as the sum of its parts, as it were. If you’re using your Keurig as part of a coffee business, you should always start your morning coffee routine by grinding fresh coffee beans. These clean coffee grounds will help your reusable pods to last longer and reduce plastic waste!
How Often Should A Keurig Coffee Maker Be Cleaned?

This largely depends on how much coffee you drink. On average, your coffee maker should be cleaned once every sixty days or sixty coffees. If you run a coffee bar or coffee shop, you should clean and descale your regular coffee maker every day or two days.
Keeping your machine clean is a fairly simple process that, if performed regularly, will extend your coffee maker’s life.
How Do I Clean & Descale My Keurig Coffee Maker?
There are several steps to cleaning and descaling your Keurig coffee maker. These should be on a regular basis – for most regular coffee makers, and they should be cleaned and descaled once or sixty cups of coffee or every sixty days.
Standard Cleaning
A few standard cleaning procedures should be a part of any cleaning routine. Start by unplugging your coffee machine. Next, remove all of the removable parts of your maker – this includes the pod holder, cold water reservoir, charcoal filter (see how to replace this above), and drip tray.
Empty your drip tray and set it in the sink, along with your pod holder. Wash these with warm water and soap and set them aside to dry. If you have a drip coffee maker, like those that require coffee filters – try cleaning out the filter tray – as this sometimes has leftover coffee debris that blocks correct water flow through the exit needle.
Beyond this standard cleaning, you may need to perform descaling – a process of removal of limescale (and other crap) build-up from inside your machine’s water tubes.
How to Descale Your Keurig
One of the most common fixes for a clogged coffee maker is descaling. Over time, hard water begets calcium buildup and other minerals throughout your water tubes. These can also build up around needles and other parts of your coffee maker that make exact flow of water almost impossible – or severely reduced – to the point of becoming unusable and leaving a bad taste in your mouth.
Descaling your Keurig is the quick fix for this bad taste and takes about 15 minutes or so and will remove a buildup of lime scale from hard water usage.
You’ll need a descaling solution to run through the machine. There are two types of descaling solutions: a homemade descaling solution and a Keurig descaling solution.
A homemade descaling solution can be used with almost any coffee maker. There are several descaling solutions that you can DIY.
- 1/3 cup vinegar, 2/3 of warm water. Unfortunately, this leaves behind a vinegary smell for several hours, which many find unpleasant.
- One gallon of water, 1 tbsp of citric acid pellets. Citric acid provides an alternative to vinegar while leaving a more pleasant smell in the home.
- 1/4 cup of baking soda, and 1 cup of lukewarm tap water.
Once you have your descaling solution of choice, fill your water reservoir with the solution and run it through on a water-only brew. You will need to do this several times until your reservoir is empty.
Once the descaling cycle is complete, run another brew cycle with water only to flush the system.
Another option is to buy a $17.00 Keurig-specific cleaning solution from Amazon. This will perform the same procedure as your homemade alternative but is specifically made for Keurigs.
We hope our guide has helped you get back to making your morning cup of Joe in about 20 minutes! If any of these steps have failed to yield a result, be sure to contact Keurig customer care and ask for their advice.